Sauna Insulation Basics for Backyard Builds
How sauna insulation works, what materials to use, and how thickness affects heat retention and operating cost.
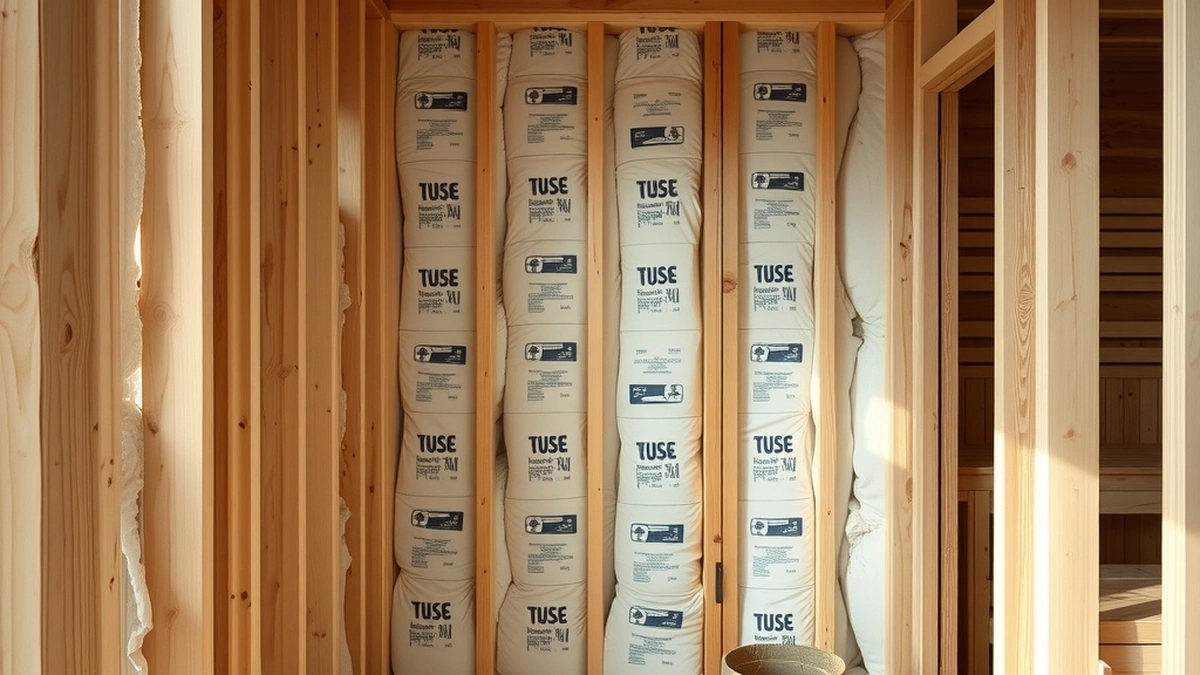
Proper sauna insulation slows heat loss through walls, ceiling, and floor, letting the heater reach temperature faster and use less electricity per session.
- Typical wall insulation
- Mineral wool or fiberglass batts
- Common R-value range
- R-13 to R-19 for walls
- Ceiling insulation depth
- 10 to 14 inches in many builds
- Vapor barrier placement
- Warm side of the insulation
- Estimated material cost
- $1.50 to $3.50 per square foot
Some links on this page are affiliate links.If you buy through them we may earn a commission at no extra cost to you. We do not accept payment for rankings. Read the full disclosure.
Sauna insulation slows the movement of heat from inside the sauna to the outside air. In a backyard sauna, walls, ceiling, and floor all transfer energy to the surroundings, which forces the heater to work longer to reach and hold temperature. Adding insulation between the studs and sealing the assembly with a vapor barrier is the standard way to limit that loss.
The result is a room that heats faster and holds heat longer between sessions. Insulation does not create heat, and it does not replace a properly sized heater. It simply reduces how quickly the heat you already paid for escapes through the building envelope.
How Heat Moves Through a Sauna
Heat leaves a sauna through three mechanisms: conduction through solid materials, convection through air leaks, and radiation across surfaces. In a wood-frame backyard sauna, conduction through uninsulated walls is usually the largest factor. Wood itself has some insulating value, but a single layer of cedar or hemlock paneling is not enough to stop meaningful heat loss at typical sauna temperatures.
Ceiling losses are especially important because hot air rises. If the ceiling is uninsulated or poorly sealed, the warmest air in the room transfers heat to the roof structure and disappears. Floor losses are smaller in most designs, but they matter if the sauna sits directly on a concrete slab or unheated ground.
Air leaks around the door, heater penetration, and wall joints also carry heat out. Insulation batts do not stop air movement, so sealing gaps with caulk or foil tape is part of the same job.
Common Insulation Materials
Mineral wool and fiberglass batts are the most common cavity insulations for sauna walls. Mineral wool handles higher temperatures than fiberglass and does not melt or sag as easily, which is why some builders prefer it near the heater. Fiberglass is less expensive and widely available, but it must be kept dry and fully separated from the sauna interior.
Rigid foam boards are sometimes used on the exterior side of the wall sheathing to create a continuous insulation layer, but foam should never be exposed inside the sauna where high heat can degrade it or release fumes. Spray foam is generally avoided in the sauna cavity because it can off-gas at temperature and is difficult to remove if a leak develops.
Natural materials such as sheep’s wool or cotton batts appear in occasional custom builds, but they are less common, harder to source in consistent R-values, and may require additional fire-blocking details depending on local code.
R-Value Targets by Assembly
Wall cavities in a standard 2x4 sauna wall usually accommodate R-13 or R-15 batts. A 2x6 wall can take R-19 or R-21. Ceilings with deeper framing often target R-30 to R-38 because of the greater heat-loss potential overhead. These are design targets, not performance guarantees; actual results depend on installation quality, air sealing, and the quality of the vapor barrier.
A simple way to think about the tradeoff is that each step up in R-value slows heat loss, but with diminishing returns. Moving from an uninsulated wood wall to R-13 produces a large improvement. Moving from R-19 to R-30 in the same wall produces a smaller one, while costing more and consuming more interior space.
Vapor Barriers and Moisture Control
Saunas generate high humidity, and warm moist air will drive into wall cavities if it can. Once inside, that moisture can condense on cooler framing or sheathing, leading to rot, mold, or degraded insulation performance over time. A vapor barrier on the warm side of the insulation—the interior side, between the insulation and the sauna paneling—blocks that drive.
Common vapor barriers include 6-mil polyethylene sheeting or specialized foil-faced products. Seams should be overlapped and taped, and penetrations for the heater, temperature sensor, and lighting should be sealed carefully. The barrier must be continuous; gaps around outlets or at the floor-to-wall joint create paths for moisture-laden air.
Interior paneling is not a vapor barrier by itself. Wood absorbs and releases moisture, but it does not stop vapor drive at the rate needed to protect a wall cavity in regular sauna use.
Cost and Heater Load Arithmetic
Insulation cost varies by material and local pricing. As an estimate, mineral wool or fiberglass batts plus vapor barrier and fasteners might run $1.50 to $3.50 per square foot of wall and ceiling area. For a small 4-foot by 6-foot sauna with an 8-foot ceiling, the wall and ceiling surface area is roughly 160 square feet, suggesting a material estimate in the range of $240 to $560 before labor, paneling, or benches.
Heater sizing is usually expressed in kilowatts and depends on the room’s cubic volume, not just insulation quality. A poorly insulated 200-cubic-foot sauna might require a more powerful heater to reach temperature in a reasonable time, while a well-insulated room of the same size could hold temperature with less input. The exact difference depends on outdoor temperature, wind exposure, door usage, and heater efficiency, so there is no universal kilowatt savings figure.
As an example of operating cost, if a sauna heater draws 6 kilowatts and electricity costs $0.16 per kilowatt-hour, one hour of operation costs about $0.96. If insulation and air sealing reduce average run time by 15 minutes per session, that saves roughly $0.24 per session. Over 100 sessions, that is about $24 in electricity, which illustrates that insulation pays back slowly through operating savings alone. Its main value is comfort and warm-up time, not immediate energy payback.
Installation Details That Matter
Batts should fit snugly between studs without compression. Compressed insulation loses R-value because the air pockets that provide resistance are squeezed out. Gaps at the top or bottom of a cavity allow convective loops inside the wall, which reduce performance.
The vapor barrier should be installed before the interior paneling. Staples or tape hold it in place, but every staple or nail is a potential vapor path, so minimizing penetrations and sealing them matters more than the fastener type itself.
Ceiling insulation should extend over the top plate of the walls to avoid a thermal bridge at the eaves. In cathedral or sloped ceilings, baffles may be needed to maintain a ventilation gap between the insulation and the roof sheathing, depending on the roof design and climate.
Door gaps are a common weak spot. A sauna door that does not close tightly leaks heated air continuously during use. Adjustable latches, magnetic seals, or compression gaskets can reduce this loss without changing the wall insulation.
Where to Learn More
If you are planning a full backyard build, local permitting requirements may affect wall construction, clearances, and electrical work. See our overview of backyard sauna permits for context on where those rules usually apply. The choice between barrel and cabin shapes also changes how much wall and ceiling area you need to insulate, which is covered in our comparison of barrel versus cabin saunas. For equipment pairing, our guide to the best sauna heater explains how heater output relates to room volume and insulation quality.
Sauna insulation is a building-science question, not a comfort luxury. A well-insulated room reaches temperature sooner, holds it with less heater runtime, and protects the structure from moisture-driven damage. The materials are inexpensive relative to the total build, but the installation details determine whether they perform as intended.
Frequently asked questions
Does a sauna need insulation?
Yes. Without insulation, heat escapes through the walls and ceiling, so the heater runs longer and the room stays cooler than intended.
What R-value should sauna walls have?
Many backyard saunas use R-13 to R-19 in the walls, while ceilings often target R-30 or higher because heat rises.
Can I use fiberglass insulation in a sauna?
Fiberglass batts are common in sauna walls, but they must be fully sealed behind a vapor barrier and interior paneling.
Where does the vapor barrier go?
On the warm side of the insulation, between the insulation and the interior wood, to keep moisture out of the wall cavity.
Does insulation affect heater size?
Yes. Better insulation reduces heat loss, which can allow a smaller heater to maintain temperature, though heater sizing still depends on room volume.
How much does sauna insulation cost?
Materials often run about $1.50 to $3.50 per square foot, depending on insulation type, vapor barrier, and local pricing.
Sources
Some links are affiliate links.If you buy through them we may earn a commission at no extra cost to you. We do not accept payment for rankings. Read the full disclosure.